Overwhelming – How to Survive

Once we are familiar with the term, it’s time to pay attention to the other side. Lists that are specifically built to Overwhelm are not easy to handle with, and get even harder if the player is experienced in that playstyle. The following article is a mix of many tips, models and traits that will give an edge when heavily outnumbered. If you are heading to a tournament you should check if you are able to at fulfill at least one of those requirements.

First of all, let’s have a quick check on how Factions can get nasty and abundant in activations.

1 Cult of Yurei: Very dangerous. It’s plenty of Fear and Ki feats that will make you lose activations, summoners and extremely resilient and cheap models.

2 Savage Wave: Very dangerous. Bakemono is what we are talking about. A great horde with extreme mobility along summoning and denying powers. Limited in list variation.

3 Silvermoon Trade Syndicate: Dangerous. It’s plenty of Cards and Ki Feats that will steal many activations, plus can get nasty on model count with cheap, efficient models.

4 Prefecture of Ryu: Concerning. A full Ashigaru list is a headache, but their true Overwhleming potential resides on very delicate synergies which can be broken.

5 Temple of Ro-Kan: Concerning. Not very usual, but Ro-Kan can abuse in numbers with Kamis and Peasants. Currently not very effective by themselves. They still need Monks.

6 Ito Clan: Safe-ish. Currently, Ito Clan really has a hard time to get Model Superiority and most players will prefer counting on the beefier models.


It’s important to know exactly what the strenghts and weaknesses of your opponent are. Before you start the game, take a few minutes to check the models you are going to face. Make an imaginary list of priorities and dangers. Decide how to fight or deal with them. Sometimes running forward is not the best option. Use your first movements to relocate your models to face the enemy they are supposed to fight, optimize your chances.

In those precious minutes, you should check the following points in order to counter an Overwhelming Warband.

Don’t let them touch you!: Traits like Fear and Disguise are good options to fight numbers. For every activation they waste trying to get you locked or tired, you are closer to victory. Ki Feats that tire models (Comtemplate the Existence, Hipnotic Gaze) can help you somehow and pay special attention to the Ki Feats and Special Cards that burn activations instantly (Mirage, Traps, Control Tokens). The objective is to make your opponent roll to be able to get in Btb with you, or force him to waste “Walk” actions.

Multiple Fighting:  When avoiding fight is not possible make sure their models don’t get away from combat. Split Attack as much as you can to tire many models in a single activation. Use Tireless models to preserve your activations in a fight and tie additional models when in range. Shisha is awesome for being 2 Tireless models, and the Rat Swarms can absorb a lot of activations (care Combo Attacks). Monks and some Samurai are excellent Split Attackers for their 4 M.

Use their numbers against them: Special Attacks and Defenses that move enemy models around are very effective when the board is crowded. Slams and Throws are key to knock down multiple enemies at once.

Sacrifice: It’s quite dangerous but, if you find yourself unable to prevent your opponent from getting the first Victory Point in turn 2, go full attack. Forget Scoring in Turns 1, 2 and 3 and try to kill as much as you can, regarding you opponent is Overwhelming you with cheap models. Make him pay for focusing in model superiority and seize in the first turns. Remember you forgo the first Victory Point in order to make the way to the other incoming Victory Points much easier.

Run the Objective: Get yourself a Middle Board Rush list (like seen in previous articles) and score on Turn 1. Your opponent, unless also running another Rush list, will need much more activations than he intended to score, giving you precious time to fight their numbers.

Order like a surgeon: Use your Order trait with a perfect timing. Let your tied models get exhausted in melee, but make sure you are free after your second exchange. Specials like Side step and Push are best. Then, use your Order Trait to get an extra activation with those models that got away from Melee and now face exhausted enemy models. Use that breach to focus on doing the objective while your opponent has no rested models nearby to intercept you.



Posted in Análisis, Tactics | 3 Comments

Overwhelming – Introduction

First of all, if the tittle was not clear enough, this post is about Overwhelming your opponent. What is Overwhelming, you say? I’m really ashamed of you, brother Initiate. You probably have been doing it often, even if you were not aware of it. The word refers to the ingame use of model superiority. Particularly, the intended superiority of cheap and abundant models.

How does Overwhleming win games? Quite simple: cheap and persistent models keep on sticking to every enemy model until all of them get exhausted. Then, the remaining models, usually the fast ones, take the objectives, pray, escort the VIM to the other side or just get together in a Control Zone and start a rave.

If the average rice cost of your models stick to 5, you will deploy 10 models in a 50 rice game. They will all be totally crappy models and most factions really have it impossible to keep that average.

If the average is 6, which is more factible in most factions, there will be about 8 models in the game, which is nice but not so overwhelming compared to any standard list: 6-7 models.

So, in conlcusion, to effectively Overwhelm a player  needs 8+ models. That’s the sweet spot where you win your opponent in numbers. Always remember that crappy models die easily, and sometimes you will need more than one to keep an enemy at bay, so you will need at least 2 or 3 more models than your opponent to make sure someone will stay free by the end of the turn to do whatever the mission is.

I heard you already, I know. If crappy models die easily, how can you keep the model number superiority through the game? In order to enlighten you, let’s see 7 helpful tips.

1) Accept death. Crappy models can, and surely will, die horribly in a carnage. That’s what better models usually do. Accept death, don’t play the coward but don’t throw your models to any uneccessary death. Suicide takes you to oblivion but well timed, appropiate suicides grants Victory! Remember the game Scores throughout the game, usually turn 2-4-6. If you are able to get the first 2 Victory Points you will have won, even if everybody dies. That’s why, once you get your first Victory Point, you just need to stick to the enemy and suicide your models as much as you need if it means you will get you second Victory Point in turn 4.

2) Play deffensive. Crappy models are torn appart like paper tissues. Don’t give your opponent an easier time and roll your dice in defense. You want your models alive, not your opponent’s dead. Maximum priority. Now, repeat it to yourself five times. If you see that mean bastard keeps rolling full attack in response to your strategy, don’t fear to roll a single die in attack whenever you have a chance (and obviously, if you have the initiative in the fight!). He will have learnt the lesson and won’t do it again. Then, you can continue rolling full defense.

3) Use resilient models. Some factions may have access to cheap models with Melee Skill 3 or Armour. Others may deploy Durable models. Mobility or extra wounds always help, but it’s not usual in cheap models. Some may Heal. All these will have a better time surviving combat turn after turn, and you will maintain your model superiority for longer.

4) “Order” around. The Order feat is a Complex action which will only grant you activation superiority if you can grant 3 extra activations (the complex action already counts as 2 activations wasted). You won’t have model superiority, but will have extra actions wherever you need. You could even use Order on only two models, if those are tougher than the Ordering one. You don’t get additional activations in number, but trade 2 from a weak model to get 2 with stronger ones. Obviously, the model with Order must be low in rice to keep your model count high.

5) Be “Tireless”. There are very few tireless models in the game, but they are excellent absorbing enemy activations. Try to lock down as many models as you can in Btb. Enemies will fight you and get exhausted, and you will still be ready to activate, more around and melee a second enemy model. That’s a minum of 4 activations stolen using just 2. It’s a win-win situtation.

6) Spur on everything. A few animal handlers, as well as Kairai, grant very cheap models that can “Rise” when reduced to 0 wounds, healing themselves and staying in the fight.

7) Summon! Currently there are only two factions who are able to summon models to the board. Summoning means you can compensate your loss of models with a permanent supply while the situation is under control. And it will freak out your opponent, unable to get rid of so much annoyance, forcing him to make mistakes. Rage is a good weapon. Your opponent will focus on killing everything or, on the contrary, avoiding it, when he should be using a balanced tactic and decide every action wisely. Watch how each turn advances, and keep your summoner models ready to summon by the end of the turn wherever support is needed, don’t waste their Ki and activations lightly.

The article will continue in deep soon, with specific Strategies and Tactics. Meanwhile, remember not raging when your plans go down the drain. Your models should be regarded as dead men walking and this is all about having fun playing a game. Anything you intend to do, you’ll get it eventually. Yurei are known for their patience and long term plans.


Posted in Análisis | Leave a comment

Evil Cult Treacheries – “Taka” makes friends

Hello once again, welcome everybody, both my dear Cult Iniciates and those heartless spies from other dull Factions.

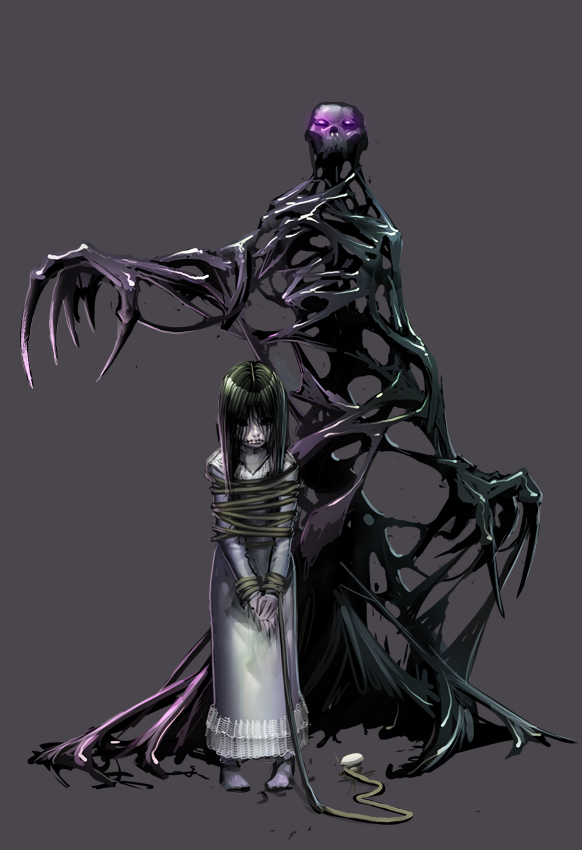
Today I’m going to speak about one of the best models in the Cult of Yurei: Taka.

takaa


This little Orphan of Yurei lacks size but is plenty of evil tricks. As a first analisys we see she’s short on wounds (just 4) and Melee Skill (just 1). Yet, she’s Small and can hide easily from shooters and has Fear (5) which is awesome to keep those pesky cheap models away from her. Even in melee, she still has Dodge which can save her life. But never rely on dodge, remember it. If she is caught in melee she’ll be useless, if not dead. Even a bakemono could get rid of her in melee once the Fear is passed.

So what’s so awesome about her? Everything! But mostly her two Ki Feats. Couldn’t say which is better.

“Unleash Wrath”

This Ki feat should be, 95% of the games, cast in Turn 1. Don’t ask, just do it. If there’s not much menace from shooters, run with Taka and Summon Wrath in her second activation. Try to move her into a defensive position, behind a wall or next to a forest, and summon Wrath within 2” of her at the other side of the wall.

Wrath is badass, even with 2 Ki. Don’t waste points ok Kimiko’s whistle, you could save that rice for something better (like a Small Rat Swarm or Drain). He has 3 uses.

A) As a general rule, use him to catch weak models (2 Ki supports and casters best) that are in positions difficult to reach or behind other model’s Zone of Control. You will quickly heal Ki and grow while not letting those models give their support or declare Scenario Actions.

B) It’s the ultimate assassin. His extreme mobility makes him perfect to melee or charge from difficult positions to get an enemy model from behind. Use Kairai or similar to force the enemy model give their back to Wrath and once exhausted It’ll be a piece of cake. Remember he can jump from Strategy A to B without problems thanks to being intangible.

C) It’s the last desperate life savior. If a dangerous enemy model is about to declare an action that you cannot let happen by any mean, Wrath can boost his movement and Charge that model to tire or lock him in Btb. Strategy A and B are sweet so don’t try to do C unless there’s no other option. And try to keep Taka ready with 2 Ki in case Wrath is slain.

Remember A, B and C are not so important when playing a VIM scenario. We’re talking about a Sharp model inmune to Opposed Ki Tests. The VIM is always maximum priority!

“Instill Wrath”

This Ki Feat is what makes Taka be so popular. Almost every player I faced until now has felt true despair with her. Stun + Berserk make unbelievable combos. Let’s see them:

Scenario Objectives: Buda heads, Shrines, Zones… Just anything that requires a model to be Still and hold position. Turn that model Berserk and smile watching it run away fiercely from his position.

Dangerous Fighters: A stun is always good. If an Enemy model is too dangerous in melee, a Stun will limit his lethality and force him to melee the closest one, probably saving your most delicate models. You can even use Small Rat Swarms as decoy to keep your models alive.

Dangerous Shooters: Well, very strong shooters tend to be crappier in melee. Add a stun here. Now, let’s remember that while Berserk they are forced to Melee or Charge (towards you!) and are unable to shoot. A well placed “Instill Wrath” in Turn 2 renders any shooter useless and places it, stunned, next to your forces. Yay! Such a little heart for so much love.

Large Swarm of Rats: It’s Tireless. So a Berserk and Stunned model will run into him and you won’t lose activations. Now, you can go full defense and let that model lose both activations and then go somewhere else. Or you can throw a few dice in attack and combo-pierce-devour that model (while risking being wounded) now that he’s low on MS and can’t go deffensively. You can even go defensive until he gets Exhausted to fight back.

Kato likes Masks: A 3 MS exhausted, stunned and berserk model (without adding any more potential debuffs) will only roll 1 die in attack. That’s 0 defense. Yes, that’s an automatic “Ivory Prison Attack” unless you roll aces (just don’t play risky and roll at least a couple of dice, boosting if neccessary). Oh, Onis and Butos are MS3 models? Yummi.

Kato likes Puppets: It’s quite amusing. Just keep close the Controlled model (better a heavy hitter) to the one you are about to turn Berserk. Yes, he will attack his ally. Yes, his (controlled) ally is going to roll full attack. Enjoy the fireworks. Remember to drain all the Ki from the controlled model with a Kairai, if possible.

Mo Ises likes Trains: You can play this on turn 1 , but be aware it’s very risky and you won’t summon wrath. The “Love Train” only calls once in a game, and your enemy shouldn’t be missing it. Run with Taka and use her gaze on the second activation to “Instill Wrath” to a model that ran and you really want in the afterlife (if he didn’t ran, he may not be in her Ki Feats range). Watch how that model walks directly to you. Now, move Mo Ises into range and if his Ki Feat is successful, make the enemy walk into your lines and give his back to you. The Enemy will have Ran plus Stunned, Exhausted, Surprised and forced to roll his dice into attack (no option to boost, Surprise Attack). Now, tear it apart, “Ivory Prison” it, Combo-munch it or whatever pleases you the most.

Have Fun my dear Acolytes!

Posted in Análisis, Cult of Yurei, Tactics, The Cultist | Tagged | Leave a comment

Capturing the Center – Part 7 – Special Cards

In this final chapter of “Capturing the Center” I will mention 2 Special Cards, both very powerful and versatile if included in any Warband (for all factions):

Elixir of Vigor: This allows you to have an extra activation with one single model. That allows you, if used in the first turn of the game, to reach the center of the table easily with any Movement 4+ model in the game (if it’s not slow). Can also be used for offensive purposes in the first turn, but need to be done with lots of care because can lead you more than once to a lots of trouble too soon in the game. You can also save the Elixir for later in the game with infinite possibilities, but that will be commented in the future, not in this article.

Vial of Raijin’s Breath: With this and a Movement 5 model you can reach the middle objectives in one Run action. Also, you will ignore other models and terrain during the movement if at the start of it you can see your destination. Useful in models like Oni, that can ignore his allies bakemono and jump over them to the center of the table. (In that particular case you’ll WANT to use “Darkness”, or Ranged attackers and casters will be a serious threat for the Oni if he jumped too soon).

Always remember that these cards need a Ki token to work, so bear that in mind while doing your strategies. You can combine them with other rushing tactics for full potential.

Next article will be about one key model of the Cult of Yurei. Stay tuned and have fun!

Posted in Análisis, Tactics | Leave a comment

Capturing the Center – Part 6 – Syndicate

Right now, the Silvermoon Syndicate has only one way to reach the center of the table in the Turn 1:

Oda


Oda, The Jumo Trainer: This model is one of the best additions to the faction. And I mean Oda alone, not Oda+Tautolu, that I consider a bit useless as a single model. They are much better as independant models.

Oda’s Jumo Sensei Feat is an Active Ki Feat, so he can use it and he will still have his both activations. That’s nice, because he will need those activations to perform Order. With this ability and some Buto you can reach the middle scenario objectives easily, and threaten your enemy with powerful warriors. Take care with Ito Clan or Savage Wave agressive tactics, or Katsumoto & Samurai warbands while doing this. Maybe you need to include at least one Rose in your warband for “controling” your opponent models and deny him the objectives.

Later you can advance with Oda (he will be in the rear, a bit safe depending on your enemy models) to be at reach of your Buto, keep using the Jumo Sensei Feat, and in turn 3+ he can use Order or Focus when needed (with Focus he can use his Jumo Sensei twice).

Have fun!

Posted in Análisis, Silvermoon Syndicate, Tactics | Tagged | Leave a comment

Capturing the Center – Part 5 – Wave

Like the Ito Clan, the Savage Wave is limited in his ways of reaching the middle of the table. The main tactic is to use the Bakemono Horde, as they excel in all the scenario stuff, but they let you few room for other models.

nian


  •  Bakemono Horde: The objective here is to reach at least 6 Ki with the Bakemono while doing the warband, more if possible. 6 ki allows you to Summon a Bakemono later in the game (that can be nasty with the Bakemono Cave) and, maybe the most important, lets you to use the Darkness in turn 1. Darkness is 5 ki, but you still need some ki for Shadow Walking. All bakemono need 2ki for shadow walking 2 times (one on each activation) for being capable of reaching the middle objectives. Tra-Peng only need 1 Shadow Walk due to his Scout trait (indeed he don’t need even the darkness if you use the terrain wisely or deny the LoS to your enemy blocking it with your Oni). I usually include Tra-Peng, Zung-Fu/Okina&Oto, and 3-4 Bakemono in my lists. That’s 22-27 rice, and you still have 23-28 rice for the rest of the warband (normally, one Oni and a Beast or Onisho, and Jun if possible).
  • The agressive way: Just like the Ito Clan, the Savage wave have a lot of models with large base and movement 5. Capturing an objective knowing that the Nian can jump at you, or Zuba (that can deny also with his ranged attack) is scary. In addition,  if you also have bakemono in your warband, the darkness helps you against the opposed ki tests and most of the ranged attacks that turn. Take care with your loses playing agressively though, because the Savage wave need numbers to work well.


Posted in Savage Wave, Tactics | Tagged , , , | Leave a comment

Capturing the Center – Part 4 – Clan

The Ito Clan is a powerful faction. They have fast and lethal warriors, and Shisai for channeling extra ki. However, to reach the center of the table they are somehow limited. There are two main tactics:

  • Satoshi & Company: Satoshi is an excelent model in all scenarios. With him, 3 Ashigaru (Temple Bushi, Hitoshi, Chiyo, Jade Mamba, Saburo or Takeji) and 1 Shisai (for the extra ki that Satoshi needs), you can use “Order” in First turn of the game, and capture up to 3 objectives. To do this, you need around 35 rice points of your warband, with the extra rice for an elite warrior of your choice or more troops.
  • The agressive tactic: With 40mm base models of movement 5, you can “deny” the objectives to your opponent. You can’t capture the objectives, but models like Kenzo or Yatsumata can Run, and threaten the enemy models with a possible and dangerous attack. Most of the models will be exhausted in the center of the table (and possibly they ran also) so are easy prey for the Elite warriors of the Clan. Add Naoko and your enemy will move very cautiously if he want to survive. However, take care with some Opposed Ki Feats when advancing to the center of the table, because your own models may become too much exposed.

Itosam01f

Posted in Ito Clan, Tactics | Tagged , , , , , | Leave a comment

Capturing the Center – Part 3 – Cult

The Cult of Yurei has possibly the most powerful objective grabbers of the game, but also he is limited with his choice of models for reach the center of the table fast enough.

The Cult has also a lot of models that can deny the objectives to the enemies (MoIses, Penangalan, Taka…) but they need a dice roll, you can use them if you feel lucky, but I don’t recomend include lots of these models (but at least one is highly recomended). They are very useful conditioning your opponent movements and decisions, and thats their true power.

Right now there are two tactics:

  • Nezumi/Nezumi Kun: I can say that including at least one of the Rat-Men is mandatory in a Yurei Warband. They are awesome in all scenarios. These two yokai can reach the middle objectives just with a single Run Action. Scout + Movement 5 and Leap make them exceptionaly mobile. Take care with some agressive lists however, running and then being in the center of the battlefield exhausted is very dangerous.
  • Breath of Yurei: If you can’t reach the center, you still can deny the center to your oponent. With this special darkness very few lists will be capable of reach the objectives in first turn. You can also use the darkness with Wraith for instill true fear to your oponent, he probably will hate you…

Wraith

Have fun!

Posted in Cult of Yurei, Tactics | Tagged , , | Leave a comment

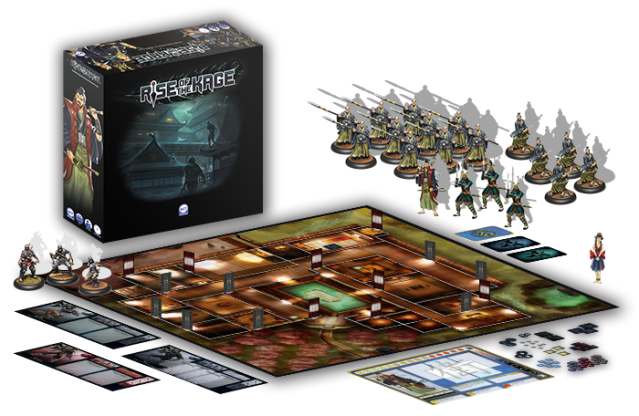
Buy your Rise of the Kage now!

risekage

GCT Studios (Fathers of Bushido, for me the best miniatures game) has made another game. Help them to make the game even better and contribute in their funding campaign here:

RISE OF THE KAGE

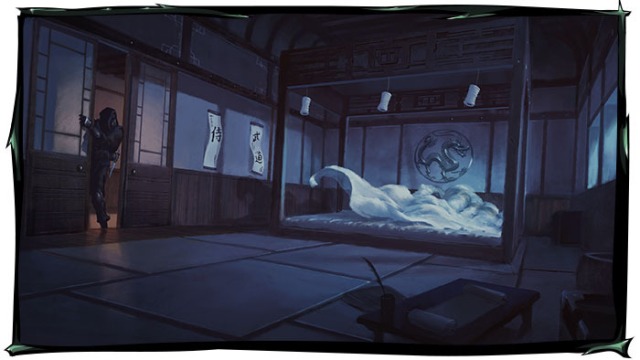
Rise of the Kage is a game where 1-3 players play as Ninjas of the Shadow Wind Clan, working cooperatively. They complete missions and fight against the Guards of the Prefecture of Ryu (controlled by another player).

risekage3risekage2

Posted in Uncategorized | Leave a comment

Capturing the Center – Part 2 – Temple

The Temple is very versatile faction. It has a lot of possible ways to reach the middle of the table fast, but the synergies between the models are needed to work.

rokan


We can divide the models in 3 types (for this article):

  • Models with Boostable Movement: Master Po, Kenko, Yumi, Riku, Kitsune, Hotaru, Seiji… these are the bread and butter of a Temple Warband, the Core Monks, capable of fighting against different foes (Slam, Combo, Sidestep, Defensive traits…) or running for do some scenario stuff. Suchiro & Sojobo are a different kind of warriors, because they are outstanding defending positions against enemies, like a tank, but they can’t boost their movement.
  • Models that can Boost other models: Air Kami, Aiko, Farmer*, Ekusa… some of these are needed to use your core monks full potential. The objective here is achieve base movement value of 7 (then you can reach the center with only one Run Action). Aiko or the Air Kami gives you instant +1 movement (+light footed! yay!). Ekusa can channel extra ki for the boost, and the Farmer can help you to boost easily to 7 Movement, but he need also an extra Ki for being capable of using Faith in first turn (Ekusa, Kawa, or Ashinaga can help here).
  • Models that can work alone: Koji can reach the middle alone, with Scout + using his Ki for a Movement Boost. Shisha can reach the center of the table also in first turn, but he needs to leech 3 Ki.

This offers a lot of possible combinations of Warriors + Supports that let your warband reach the center of the battlefield fast enough. For example:

—————–

Suchiro

Kenko

Yumi

Seiji

Kawa

Air Kami

Rice Farmer

—————-

Posted in Tactics, Temple of RoKan | Tagged , , , , , , , , , , , , , , , , | Leave a comment